전체 가이드

레벨 102

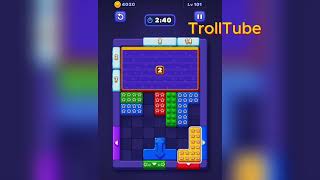
Block Out Level 102 flips the usual formula — instead of sliding blocks out, you're placing them in. An empty main grid sits above a bottom inventory of L-shapes and 2×2 clusters, and the step counter tracks each transfer. The puzzle is...

중간

iOS / Android · current iOS and Android catalog checked 2026-08-03

빨강 노랑 초록 파랑 보라 시안

이 보드 특징을 확인하세요

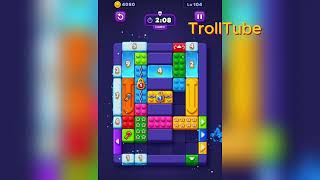
Block Out Level 102 flips the usual formula — instead of sliding blocks out, you're placing them in. An empty main grid sits above a bottom inventory of L-shapes and 2×2 clusters, and the step counter tracks each transfer. The puzzle is spatial: fitting every piece cleanly without blocking the middle column, where one misplaced green `1` tile can seal the board.

  • Block Out Level 102 flips the usual formula — instead of sliding blocks out, you're placing them in.
  • An empty main grid sits above a bottom inventory of L-shapes and 2×2 clusters, and the step counter tracks each transfer.
  • The puzzle is spatial: fitting every piece cleanly without blocking the middle column, where one misplaced green `1` tile can seal the board.
출처와 비교

내 보드가 달라요 출처와 비교

영상 공략

빠른 팁

  1. Keep the center column empty until the highlighted 초록 `1` piece is placed.
  2. Watch the step counter — you should reach step 6 before the lower half is fully packed.
  3. If the board feels stuck, look for the color with the cleanest path and use that to regain space.

단계별 해법

단계별 해법

  1. 1

    Move 1

    Drop the first bottom-tray cluster into the upper-left of the main frame to open the run (step 1).

  2. 2

    Move 2

    Place the next two clusters along the top row so the center column stays empty.

  3. 3

    Move 3

    Move the highlighted 초록 `1` piece through the open center column before filling the lower half.

  4. 4

    Move 4

    Transfer the mid-run L-shapes into the left and right lower corners so they do not cross the center lane.

  5. 5

    Move 5

    Place the remaining 시안 and 보라 pairs along the bottom row of the main frame.

  6. 6

    Move 6

    Clear the last two-block group from the bottom tray to finish the step-11 completion.

흔한 실패 지점

Filling the center column before the 초록 `1` piece is placed — the highlighted piece then has no downward path.

Dropping late L-shapes into the middle of the grid instead of the lower corners, which blocks the final placements.

출처

출처

검증 상태: 출처 검증됨. 해법은 게시 전에 출처 보드와 대조하여 매칭됩니다.

자주 묻는 질문

내 102레벨 보드가 다르게 보이는 이유는 무엇인가요?

게임 버전, 플랫폼 또는 단계별 출시 차이로 보드 레이아웃이 바뀔 수 있습니다.

부스터를 사용해야 하나요?

이 변형은 부스터 사용을 알 수 없음(으)로 기록합니다. 이 메모를 적용하기 전에 보드를 먼저 확인하세요.