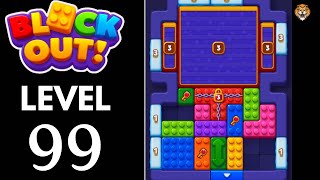
完整攻略

关卡 112

Block Out Level 112 starts with two oversized purple bars — a `7` and a `10` — that shrink through row and column slides into smaller counters as the board contracts. The solve is a slow implosion: the bars break down stage by stage unti...

专家

iOS / Android · current iOS and Android catalog checked 2026-08-03

紫色 蓝色 绿色 红色 黄色 橙色

确认这些棋盘特征

Block Out Level 112 starts with two oversized purple bars — a `7` and a `10` — that shrink through row and column slides into smaller counters as the board contracts. The solve is a slow implosion: the bars break down stage by stage until only a center `3` zone remains. Force a perimeter slide before the big bars have split and the entire collapse sequence jams.

  • Block Out Level 112 starts with two oversized purple bars — a `7` and a `10` — that shrink through row and column slides into smaller counters as the board contracts.
  • The solve is a slow implosion: the bars break down stage by stage until only a center `3` zone remains.
  • Force a perimeter slide before the big bars have split and the entire collapse sequence jams.
与来源对比

我的棋盘不一样 与来源对比

视频通关演示

快速提示

  1. The numbered tray tiles at the bottom are finishers — sliding them early closes the 绿色 smiley lane.
  2. Use the top 紫色 arrows to split the `7` bar away from the `10` block before touching the center.
  3. Think in chain clears. The best move is the one that sets up the next two moves, not just the quickest current match.

分步解法

分步解法

  1. 1

    Move 1

    Slide the left 蓝色 vertical column upward along the 红色 left arrow to free the top `7` bar.

  2. 2

    Move 2

    Push the `7` bar rightward until it splits from the `10` block and the upper board opens on both sides.

  3. 3

    Move 3

    Rotate the 绿色 smiley bar leftward through the new gap without touching the numbered tray tiles (`1`, `4`, `3`).

  4. 4

    Move 4

    Collapse the `10` bar into the center zone using the top 紫色 arrows until the board shows a single `3` pocket.

  5. 5

    Move 5

    Clear the scattered edge blocks ( 红色 left, 蓝色 top, 绿色 right, 黄色 bottom) one at a time around the `3` zone.

  6. 6

    Move 6

    Feed the 橙色 `1` and 黄色 `4` tray tiles through the bottom arrows to finish the last perimeter clears.

常见失败点

Sliding the bottom numbered tray tiles (`1`, `4`, `3`) before the `7` and `10` bars have split.

Forcing the 绿色 smiley bar downward while the center `3` pocket is still boxed in.

来源

来源

校验状态:来源已校验。解法在发布前已与源棋盘匹配。

常见问题

为什么我的第 112 关棋盘看起来不一样?

游戏版本、平台或分阶段推送的差异都可能改变棋盘布局。

我该使用助推器吗?

本变体记录的助推器使用情况为 未知。在套用该说明前,请先确认棋盘一致。