full guide

Level 101

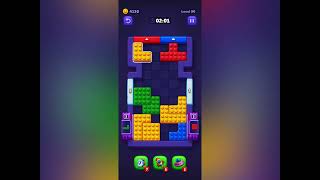
Block Out Level 101 pairs dual feed chambers β€” a `9` on top and a `4` below β€” with patterned side stacks that look important but are actually just walls. The real puzzle is timing: the red down-arrow piece in the bottom tray must wait un...

medium

ios / android Β· current iOS and Android catalog checked 2026-08-03

Purple Red Green Blue Yellow

Confirm these board landmarks

Block Out Level 101 pairs dual feed chambers β€” a `9` on top and a `4` below β€” with patterned side stacks that look important but are actually just walls. The real puzzle is timing: the red down-arrow piece in the bottom tray must wait until the upper `9` feed is nearly done before it can drop through the center lane. Rush the arrow block and it gets buried under collapsing side stacks.

  • Block Out Level 101 pairs dual feed chambers β€” a `9` on top and a `4` below β€” with patterned side stacks that look important but are actually just walls.
  • The real puzzle is timing: the red down-arrow piece in the bottom tray must wait until the upper `9` feed is nearly done before it can drop through the center lane.
  • Rush the arrow block and it gets buried under collapsing side stacks.
Compare with the documented source board

My board is different Compare with source
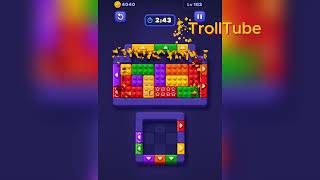
Video walkthrough

Quick tips

  1. Feed the purple dotted block first to start the upper `9` counter.
  2. Do not touch the red down-arrow piece until the upper chamber is down to its last one or two passes.
  3. If the board feels stuck, look for the color with the cleanest path and use that to regain space.

Step-by-step solution

Step-by-step solution

  1. 1

    Move 1

    Feed the purple dotted block from the bottom tray into the upper chamber to start the `9` counter.

  2. 2

    Move 2

    Peel the left red cross-pattern stack downward so the upper feed lane stays open.

  3. 3

    Move 3

    Clear the green and blue tray pieces into the upper chamber once the left stack thins.

  4. 4

    Move 4

    Finish the last upper-chamber pass while the center blue arrow column is still empty.

  5. 5

    Move 5

    Drop the red down-arrow block through the center lane into the lower `4` chamber.

  6. 6

    Move 6

    Feed the remaining patterned blocks from the right yellow/ blue stacks to close the lower counter.

Common failure points

Moving the red down-arrow piece before the upper chamber is nearly finished β€” it gets buried under the left stacks.

Clearing the right yellow stack before the upper feed lane is stable, which closes the center drop lane.

Sources

Sources

Verification status: source verified. Solutions are matched to the source board before publication.

FAQ

Why might my Level 101 board look different?

Game version, platform or staged rollout differences can change a board layout.

Should I use a booster?

This Variant records booster use as unknown. Match the board before treating that note as applicable.