full guide

Level 133

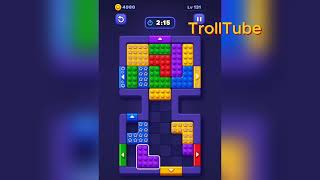
Block Out Level 133 arranges numbered key blocks on the arms of a T-shaped board, with a center `13` spine and a bottom blast grid. Directional arrows on the blue downward block and green right-strip mark the only legal exits. The top-le...

hard

ios / android Β· current iOS and Android catalog checked 2026-08-03

Cyan Magenta Green Blue Red Yellow Purple Pink

Confirm these board landmarks

Block Out Level 133 arranges numbered key blocks on the arms of a T-shaped board, with a center `13` spine and a bottom blast grid. Directional arrows on the blue downward block and green right-strip mark the only legal exits. The top-left magenta `7` alcove must clear before the tall blue `1` stack can shift β€” otherwise it blocks the center spine's only drainage path.

  • Block Out Level 133 arranges numbered key blocks on the arms of a T-shaped board, with a center `13` spine and a bottom blast grid.
  • Directional arrows on the blue downward block and green right-strip mark the only legal exits.
  • The top-left magenta `7` alcove must clear before the tall blue `1` stack can shift β€” otherwise it blocks the center spine's only drainage path.
Compare with the documented source board

My board is different Compare with source

Video walkthrough

Quick tips

  1. Keep the green left bar intact while clearing the bottom blast grid.
  2. Save the 1/10 pair until the 9 tile unlocks on the bottom flare.
  3. Think in chain clears. The best move is the one that sets up the next two moves, not just the quickest current match.

Step-by-step solution

Step-by-step solution

  1. 1

    Move 1

    Pop the top cyan 24 and 21 tiles plus the left/right arm 17 and 19 blocks before the center 13 column drops.

  2. 2

    Move 2

    Clear the bottom colored grid from the green left bar outward, keeping the 1/10 pair sealed for the final gate.

  3. 3

    Move 3

    Break the center 13 spine once both arm alcoves empty, feeding the 18 side tile into the waist.

  4. 4

    Move 4

    Slide the blue downward-arrow block through the narrow corridor after the counters shrink to 12.

  5. 5

    Move 5

    Detonate the green right-arrow cluster on the bottom flare once the 9 tile unlocks.

  6. 6

    Move 6

    Spend the bottom 0/1 counters and exit the last magenta and blue scraps for the board clear.

Common failure points

Dropping the center 13 spine before the arm alcoves empty, sealing the waist.

Moving the green right-arrow cluster before the 9 tile unlocks, trapping the 0/1 gate.

Sources

Sources

Verification status: source verified. Solutions are matched to the source board before publication.

FAQ

Why might my Level 133 board look different?

Game version, platform or staged rollout differences can change a board layout.

Should I use a booster?

This Variant records booster use as unknown. Match the board before treating that note as applicable.