full guide

Level 57

Block Out Level 57 stacks two purple boss chambers β€” '5' on top, '11' on the bottom β€” with three white '10' blocks at the very base. The chambers share a wall, so clearing one affects the other. Start with the bottom '10' blocks, then wo...

hard

ios / android Β· current iOS and Android catalog checked 2026-08-03

Purple Yellow Blue Green Red White

Confirm these board landmarks

Block Out Level 57 stacks two purple boss chambers β€” '5' on top, '11' on the bottom β€” with three white '10' blocks at the very base. The chambers share a wall, so clearing one affects the other. Start with the bottom '10' blocks, then work both chambers in parallel, letting the smaller '5' chamber clear faster while the '11' chamber gradually opens.

  • Block Out Level 57 stacks two purple boss chambers β€” '5' on top, '11' on the bottom β€” with three white '10' blocks at the very base.
  • The chambers share a wall, so clearing one affects the other.
  • Start with the bottom '10' blocks, then work both chambers in parallel, letting the smaller '5' chamber clear faster while the '11' chamber gradually opens.
Compare with the documented source board

My board is different Compare with source
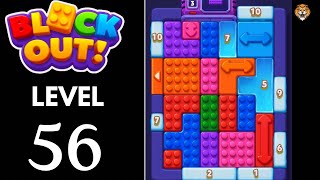
Video walkthrough

Quick tips

  1. The two chambers share a wall β€” do not fully drain the '5' before the '11' has made progress.
  2. Start with the bottom '10' blocks. They are independent targets that open the base.
  3. Think in chain clears. The best move is the one that sets up the next two moves, not just the quickest current match.

Step-by-step solution

Step-by-step solution

  1. 1

    Move 1

    Clear the three white '10' blocks at the bottom by sliding them toward the right exit.

  2. 2

    Move 2

    Shift the yellow blocks on the left out through the left exit to open the gap between the two chambers.

  3. 3

    Move 3

    Begin draining the upper '5' chamber β€” it is smaller and clears faster, opening space above.

  4. 4

    Move 4

    Work the lower '11' chamber in parallel, sliding its blocks out through the right exit.

  5. 5

    Move 5

    As the '5' chamber empties, use the freed space to help the '11' chamber blocks slide out.

  6. 6

    Move 6

    Clear the remaining green and blue blocks trapped between the emptied chambers.

  7. 7

    Move 7

    Finish with the red and purple blocks at the top and sides.

Common failure points

Fully draining the '5' chamber before the '11' has made progress β€” the shared wall provides sliding support for both, and losing it too early traps blocks.

Ignoring the bottom '10' blocks and trying to work the chambers first, which leaves the base packed and blocks can't slide down.

Sources

Sources

Verification status: source verified. Solutions are matched to the source board before publication.

FAQ

Why might my Level 57 board look different?

Game version, platform or staged rollout differences can change a board layout.

Should I use a booster?

This Variant records booster use as unknown. Match the board before treating that note as applicable.