전체 가이드

레벨 95

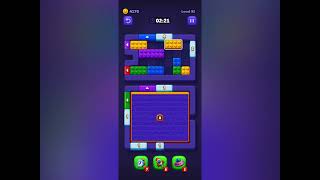
Block Out Level 95 packs colored blocks (red, orange, blue, green, purple, cyan) with lock/key gates into a horizontal upper tier, while two purple chambers fill the lower section — counter `14` in an orange frame on top, counter `11` in...

어려움

iOS / Android · current iOS and Android catalog checked 2026-08-03

보라 빨강 주황 파랑 초록 시안 노랑

이 보드 특징을 확인하세요

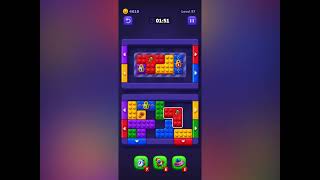
Block Out Level 95 packs colored blocks (red, orange, blue, green, purple, cyan) with lock/key gates into a horizontal upper tier, while two purple chambers fill the lower section — counter `14` in an orange frame on top, counter `11` in an orange frame below. Yellow accent blocks on the edges are free single-piece clears. Empty the upper tier completely, then feed both chambers for 25 total passes.

  • Block Out Level 95 packs colored blocks (red, orange, blue, green, purple, cyan) with lock/key gates into a horizontal upper tier, while two purple chambers fill the lower section — counter `14` in an orange frame on top, counter `11` in an orange frame below.
  • Yellow accent blocks on the edges are free single-piece clears.
  • Empty the upper tier completely, then feed both chambers for 25 total passes.
출처와 비교

내 보드가 달라요 출처와 비교

영상 공략

빠른 팁

  1. Take the 노랑 edge blocks first — they are free single-piece clears right next to exits.
  2. Clear the small blocks between tiers before starting the `14` chamber feed.
  3. Feed the `14` chamber before the `11` — it needs more room and more passes.

단계별 해법

단계별 해법

  1. 1

    Move 1

    Push the 노랑 edge blocks on both sides through the left and right exits for immediate room (01:26 in the video).

  2. 2

    Move 2

    Clear the key block (small 시안 with key icon) to unlock the 주황 block in the upper tier (01:22).

  3. 3

    Move 3

    Extract the large 빨강 blocks from the center-left through the top or left exit because they are the biggest mass in the upper tier (01:18).

  4. 4

    Move 4

    Clear the 초록 and 파랑 blocks from the right side of the upper tier through the right-wall exit (01:15).

  5. 5

    Move 5

    Remove the small 시안 and 빨강 blocks between the upper tier and the `14` chamber before starting the feed because they can drift into the lane (01:11).

  6. 6

    Move 6

    Begin feeding the upper 보라 chamber (counter `14`) — keep its lane permanently clear for fourteen passes (01:07–00:56).

  7. 7

    Move 7

    Feed the lower 보라 chamber (counter `11`) through the bottom exits — eleven passes to finish (00:53–00:45).

흔한 실패 지점

Ignoring the 노랑 edge blocks at the start — they are free room and clearing them first makes every subsequent extraction faster.

Starting the `14` chamber feed while small 시안 and 빨강 blocks between tiers are still present — they drift into the feed lane and stall the counter.

출처

출처

검증 상태: 출처 검증됨. 해법은 게시 전에 출처 보드와 대조하여 매칭됩니다.

자주 묻는 질문

내 95레벨 보드가 다르게 보이는 이유는 무엇인가요?

게임 버전, 플랫폼 또는 단계별 출시 차이로 보드 레이아웃이 바뀔 수 있습니다.

부스터를 사용해야 하나요?

이 변형은 부스터 사용을 알 수 없음(으)로 기록합니다. 이 메모를 적용하기 전에 보드를 먼저 확인하세요.