full guide

Level 112

Block Out Level 112 starts with two oversized purple bars β€” a `7` and a `10` β€” that shrink through row and column slides into smaller counters as the board contracts. The solve is a slow implosion: the bars break down stage by stage unti...

expert

ios / android Β· current iOS and Android catalog checked 2026-08-03

Purple Blue Green Red Yellow Orange

Confirm these board landmarks

Block Out Level 112 starts with two oversized purple bars β€” a `7` and a `10` β€” that shrink through row and column slides into smaller counters as the board contracts. The solve is a slow implosion: the bars break down stage by stage until only a center `3` zone remains. Force a perimeter slide before the big bars have split and the entire collapse sequence jams.

  • Block Out Level 112 starts with two oversized purple bars β€” a `7` and a `10` β€” that shrink through row and column slides into smaller counters as the board contracts.
  • The solve is a slow implosion: the bars break down stage by stage until only a center `3` zone remains.
  • Force a perimeter slide before the big bars have split and the entire collapse sequence jams.
Compare with the documented source board

My board is different Compare with source
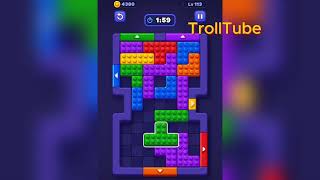
Video walkthrough

Quick tips

  1. The numbered tray tiles at the bottom are finishers β€” sliding them early closes the green smiley lane.
  2. Use the top purple arrows to split the `7` bar away from the `10` block before touching the center.
  3. Think in chain clears. The best move is the one that sets up the next two moves, not just the quickest current match.

Step-by-step solution

Step-by-step solution

  1. 1

    Move 1

    Slide the left blue vertical column upward along the red left arrow to free the top `7` bar.

  2. 2

    Move 2

    Push the `7` bar rightward until it splits from the `10` block and the upper board opens on both sides.

  3. 3

    Move 3

    Rotate the green smiley bar leftward through the new gap without touching the numbered tray tiles (`1`, `4`, `3`).

  4. 4

    Move 4

    Collapse the `10` bar into the center zone using the top purple arrows until the board shows a single `3` pocket.

  5. 5

    Move 5

    Clear the scattered edge blocks ( red left, blue top, green right, yellow bottom) one at a time around the `3` zone.

  6. 6

    Move 6

    Feed the orange `1` and yellow `4` tray tiles through the bottom arrows to finish the last perimeter clears.

Common failure points

Sliding the bottom numbered tray tiles (`1`, `4`, `3`) before the `7` and `10` bars have split.

Forcing the green smiley bar downward while the center `3` pocket is still boxed in.

Sources

Sources

Verification status: source verified. Solutions are matched to the source board before publication.

FAQ

Why might my Level 112 board look different?

Game version, platform or staged rollout differences can change a board layout.

Should I use a booster?

This Variant records booster use as unknown. Match the board before treating that note as applicable.